25 Easy Christmas Craft Ideas to Make in 2026
If you want Christmas craft ideas that are actually enjoyable to make, start with projects that use simple supplies and look lovely when finished. These 25 easy Christmas craft ideas include paper ornaments, handmade decorations, gift tags, and small holiday accents—most are practical for a relaxed afternoon at home.
There is a mix here: a few quick crafts for beginners, some more detailed paper projects for adults and teens, and several ideas you can adapt for supervised family crafting. You do not need a fully stocked craft room. Cardstock, fabric remnants, twine, ribbon, and a few natural materials can go a surprisingly long way.
Before You Start: Keep Supplies Simple
Choose two or three projects that share materials instead of buying something new for every idea. Basic scissors, cardstock, a ruler, washable paint, craft glue, and cotton twine cover many of the designs below. A cutting mat, hole punch, or blunt needle may be useful for particular projects, but those tools are not required for the entire list.
If children are joining in, assign cutting, hot tools, wire, or small-bead tasks to an adult and let younger makers help with safe arranging, folding, or decorating. Handmade decorations also need time to dry fully before they are hung or stored.
1. Folded Paper Star Ornaments

A cluster of folded paper stars can make even a simple Christmas tree feel considered and handmade. The pointed layers catch the light beautifully, especially in ivory, muted green, or soft gold cardstock. Make several in different sizes for a coordinated set, or use one as a delicate finishing touch on a wrapped gift.
You’ll need:
- Medium-weight cardstock
- Ruler and pencil
- Scissors
- Craft glue
- Small cardstock circle for the center
- Cotton thread or thin ribbon
Cut five matching strips, lightly score the folds, and bend each strip into a pointed loop. Arrange the loops evenly around a small center circle and glue them in place; add corresponding pieces on the reverse if you want a dimensional ornament that looks finished on both sides.
A neat fold matters more than a complicated shape here. Heavy board tends to spring back, while very thin paper may sag, so choose a cardstock that creases cleanly. Secure the hanging loop before closing the back and let the glue cure fully before displaying.
2. Cinnamon Stick Mini Christmas Trees
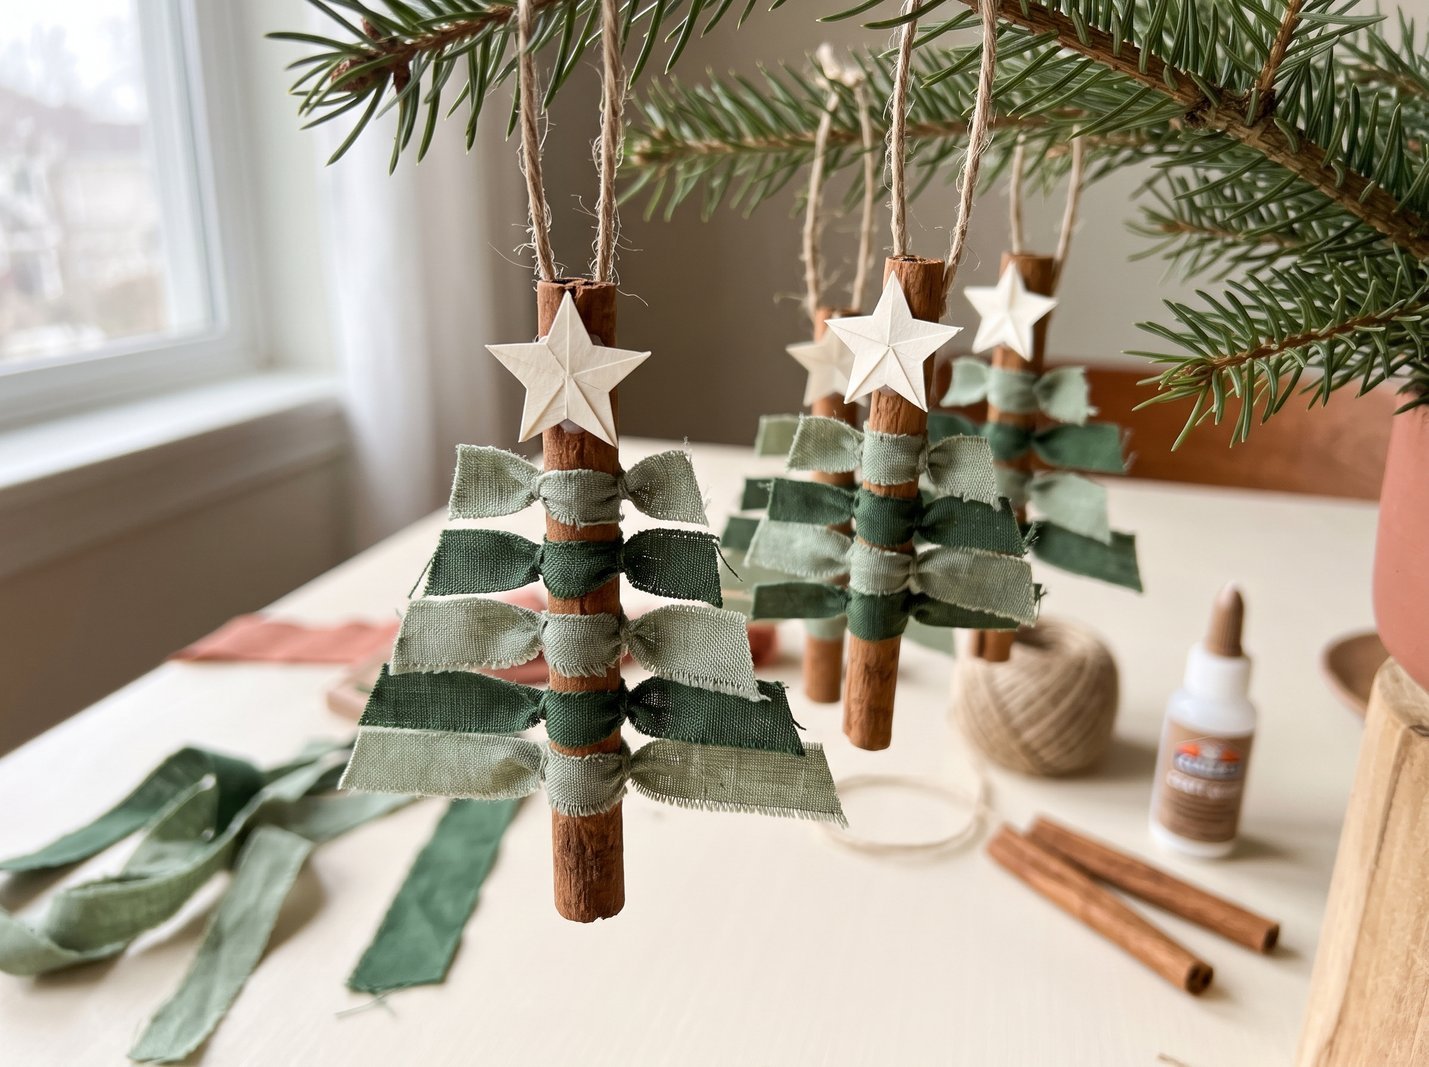
These miniature trees turn an everyday pantry item into a warm, rustic-looking ornament. The cinnamon stick becomes the trunk, while little strips of ribbon create a tiered evergreen silhouette. They are especially charming tied to gifts or scattered among natural wood and paper decorations.
You’ll need:
- Whole cinnamon sticks
- Green ribbon scraps in a few widths or shades
- Scissors
- Craft glue
- Cotton twine
- Cardstock scrap for a tiny star
Tie three to five ribbon lengths around a cinnamon stick, placing the longest piece near the bottom and shorter pieces toward the top. Trim the ends diagonally to suggest a triangular tree, then glue a small paper star at the tip and attach a twine hanger.
Choose ribbon with enough body to hold a branch-like shape, and keep the knots snug so they do not slide. These are decorative crafts rather than edible treats; if gifting them, make sure the glue is dry before packaging.
3. Paper Bag Snowflake Window Decor
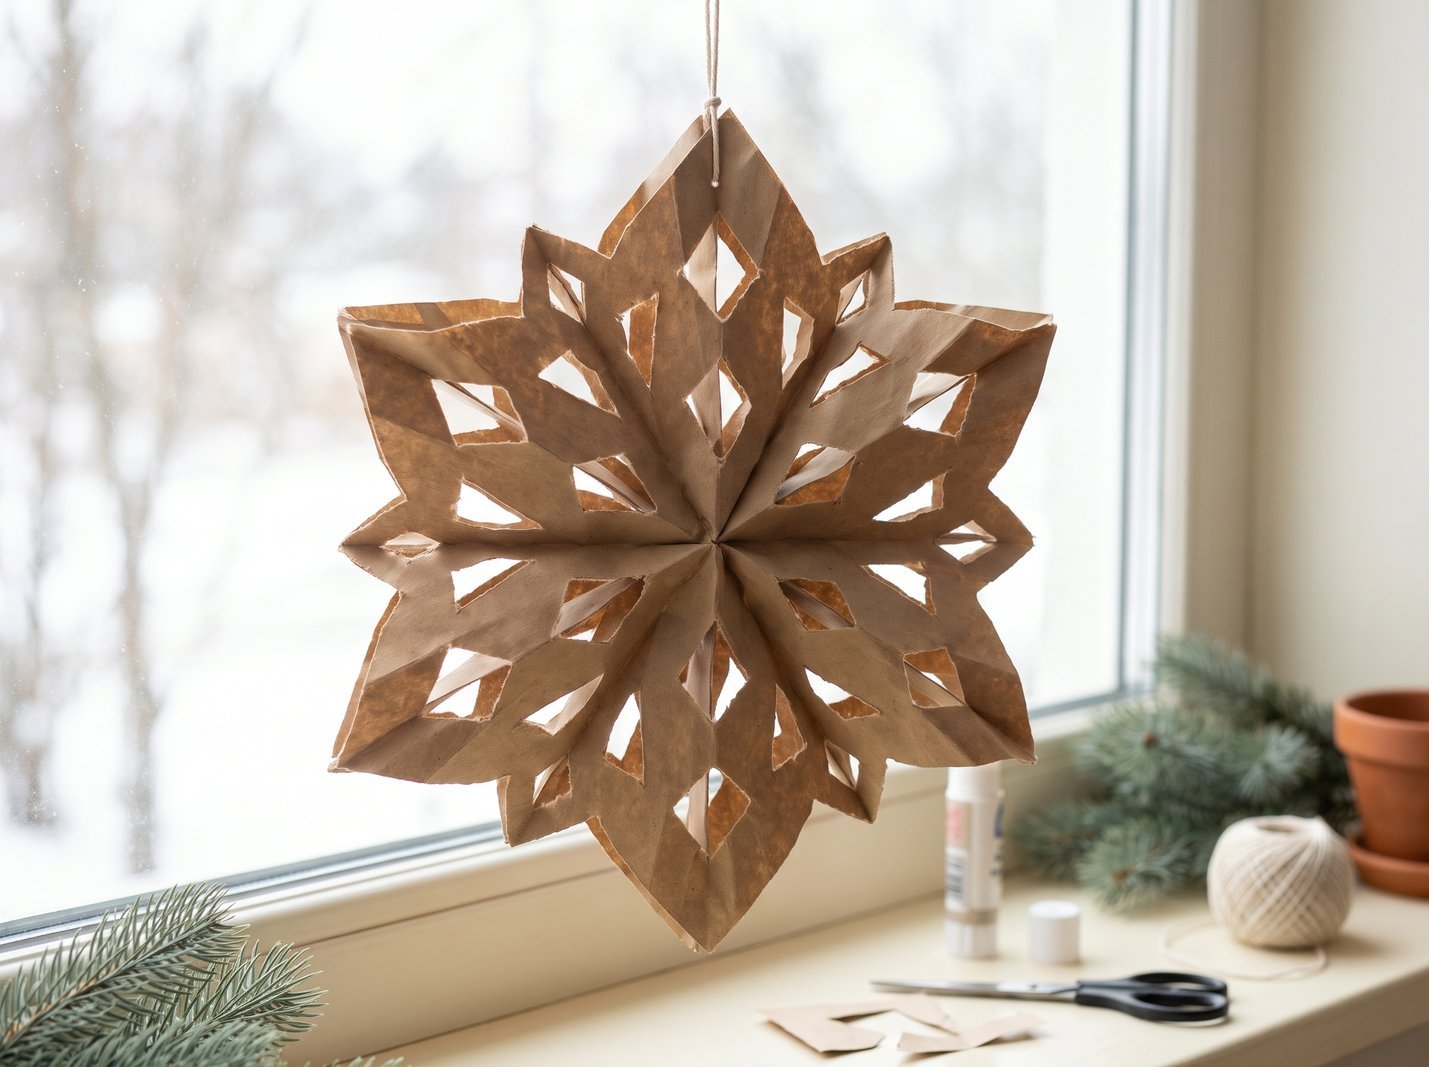
If you want a Christmas craft with dramatic results but inexpensive materials, try an oversized paper-bag snowflake. The stacked bags unfold into a sculptural rosette that looks lovely against a bright window or above a festive table. Natural kraft paper makes the finished piece feel especially soft and understated.
You’ll need:
- Plain paper lunch bags of matching size
- Glue stick or suitable paper adhesive
- Pencil
- Strong scissors
- String or clear hanging line
Lay the bags with their openings facing the same direction. Apply a T-shaped strip of glue across each bag, stack several bags neatly, then cut a simple pointed or rounded design through the stack. Open the stack into a circle and glue the first and last bags together.
Start with one test snowflake before cutting decorative side notches into every bag. Multiple layers can be thick, so an adult should handle difficult cutting. Suspend the finished decoration away from damp windows and open flames.
4. Dried Orange Slice Garland
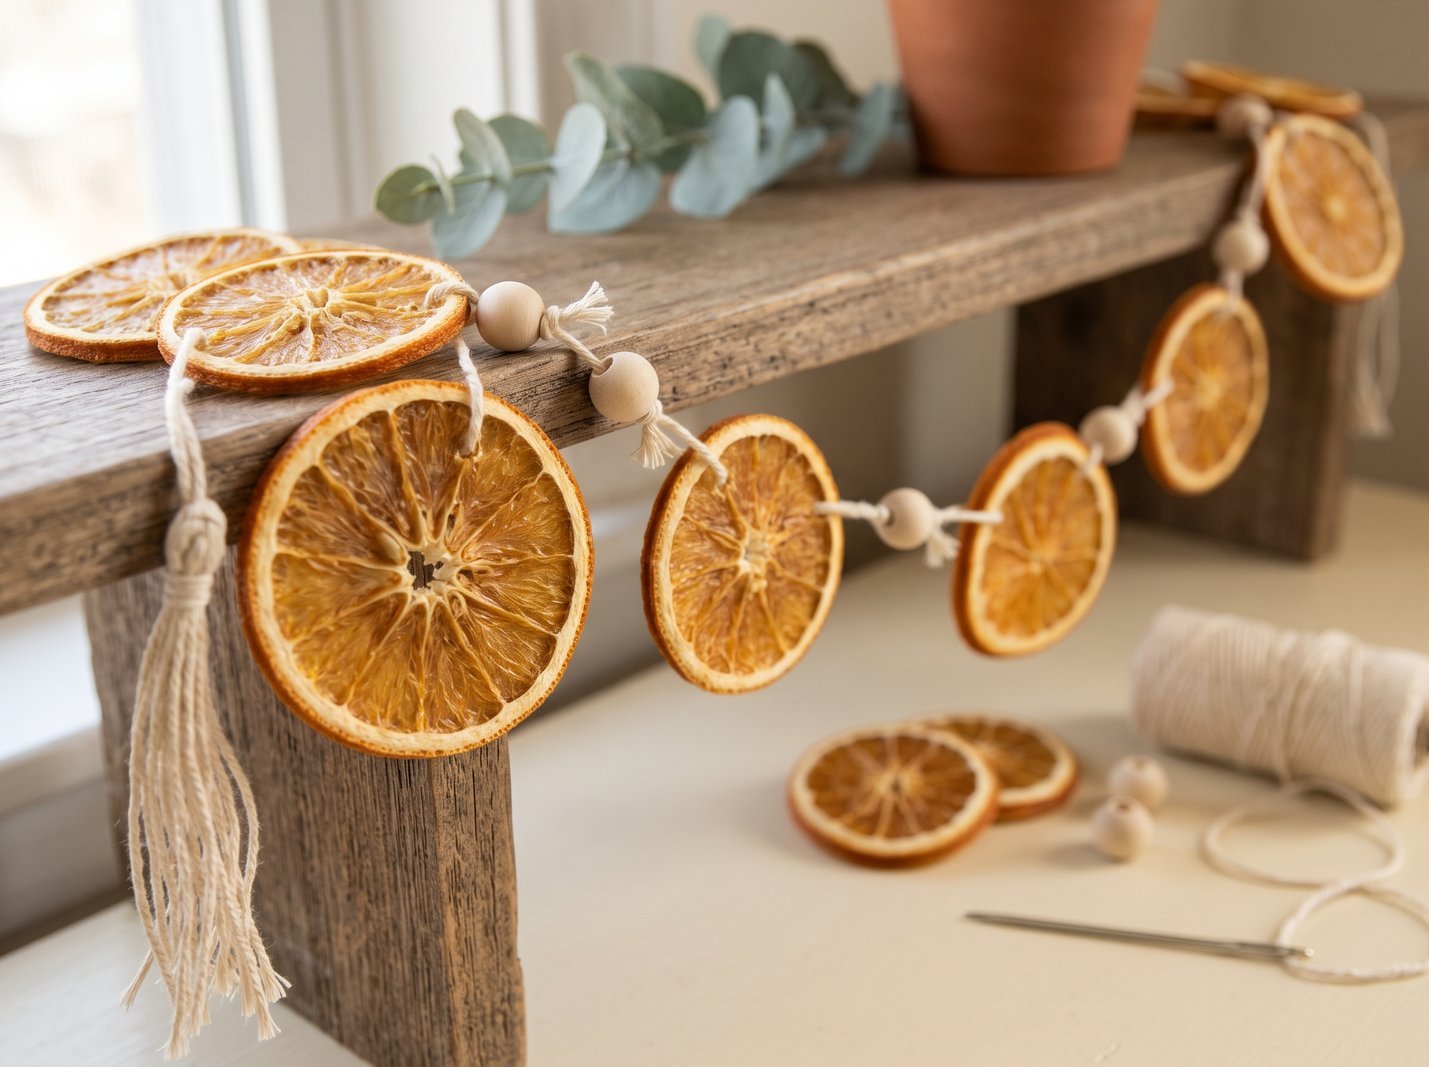
A dried-orange garland adds a beautiful amber glow to a mantel or shelf, particularly when winter daylight passes through the fruit. Paired with natural twine and a few wooden beads, it feels festive without relying on glitter or bright plastic decorations. It is an appealing choice for a neutral Christmas palette.
You’ll need:
- Completely dried orange slices
- Cotton twine or sturdy string
- Blunt, wide-eye needle
- Optional wooden beads
- Scissors
Lay out the orange slices to check their spacing before threading. Pass sturdy twine carefully through the dried fruit, alternating with wooden beads or simple knots, and leave enough extra cord at both ends for tying the garland in place.
The slices must be fully dry and cooled before assembly; any remaining moisture can encourage mold during storage. Keep the garland away from candles, fireplaces, and other heat sources, and store it somewhere dry after the season.
5. Scrap Fabric Bow Ornaments
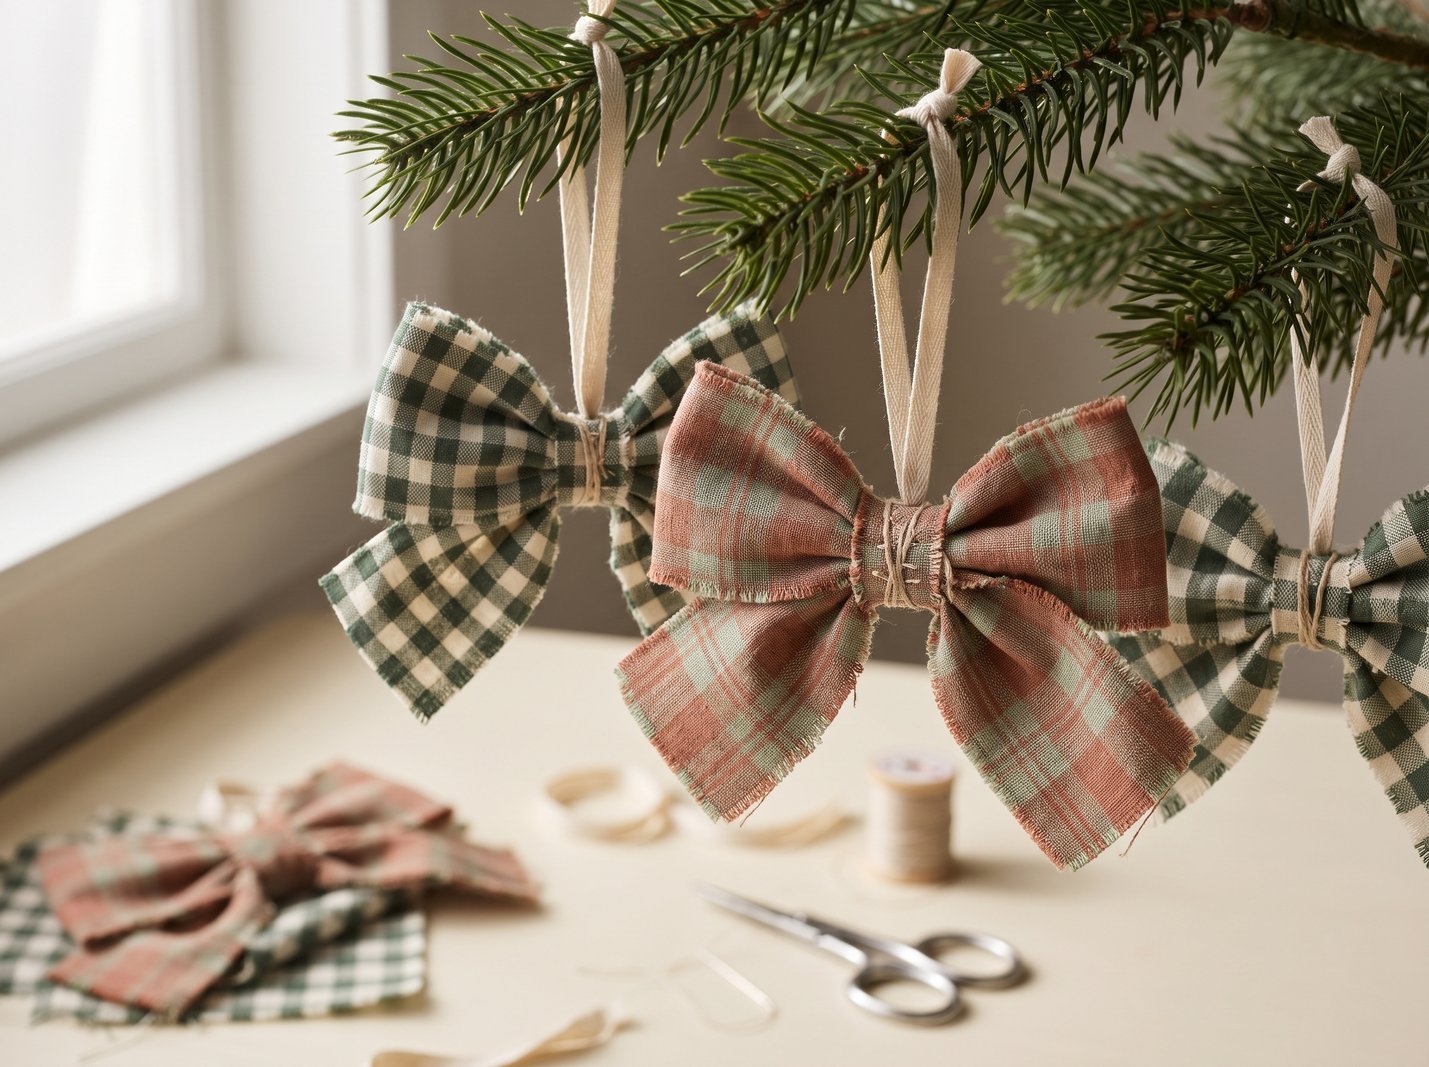
Leftover cotton and gingham offcuts make wonderfully soft Christmas tree ornaments. Simple bows add pattern and texture without overwhelming the branches, and a group of coordinated prints can make the tree look thoughtfully styled. This is also a useful project for scraps too small for larger sewing projects.
You’ll need:
- Lightweight cotton fabric scraps
- Narrow ribbon or small fabric strip for the center
- Fabric scissors
- Needle and matching thread
- Ribbon or twine for hanging
Cut a larger fabric strip for the main bow, fold its ends inward, and pinch the center until it forms two balanced loops. Wrap the narrow strip around the middle, secure it with a few stitches at the back, and stitch or tie on a hanging loop.
Choose lightweight cotton that folds easily. For cleaner edges, tuck the raw ends under before sewing or use pinking shears for a deliberately informal finish. Vary the fabric pattern rather than making every bow a different shape.
6. Painted Wooden Bead Wreaths

Tiny wooden bead wreaths have a simple Scandinavian-inspired look and are easy to adapt to the rest of your holiday decor. Matte sage beads mixed with natural wood feel restrained, while red and cream make them more playful. Their small size works well on branches, cabinet knobs, or gift packages.
You’ll need:
- Unfinished wooden beads
- Flexible craft wire
- Acrylic paint and small brush
- Pliers or wire cutters
- Narrow ribbon
- String for hanging
Paint some of the beads and let them dry completely, leaving others natural if you want contrast. Thread them onto flexible wire, curve the wire into a circle, and twist the ends securely together. Hide the join behind a ribbon bow and add a separate hanging loop.
Test the wreath size before cutting the wire, since the beads occupy more space than the bare wire suggests. Use pliers to bend sharp wire ends inward. Small beads should be kept out of reach of very young children.
7. Cardboard Gingerbread House Decorations

These gingerbread-style houses look sweet enough for a Christmas tree, but they are made entirely from reused cardboard. A white paint pen gives the illusion of piped icing, so each tiny house can have its own windows, doorway, and roofline. They are also lovely as oversized gift tags.
You’ll need:
- Clean corrugated or sturdy flat cardboard
- Pencil and ruler
- Scissors or craft knife
- White paint pen
- Hole punch
- Cotton cord
Draw simple house outlines on the cardboard and cut them out. Add a roofline, door, and windows with the white pen, keeping the marks bold rather than intricate. Punch a hanging hole above the roof and thread through a short length of cord.
Use a consistent house height if you want a matching set, but vary the window details for character. An adult should handle any craft-knife cutting, and the cardboard should stay dry so the painted designs remain crisp.
8. Salt Dough Star Gift Tags
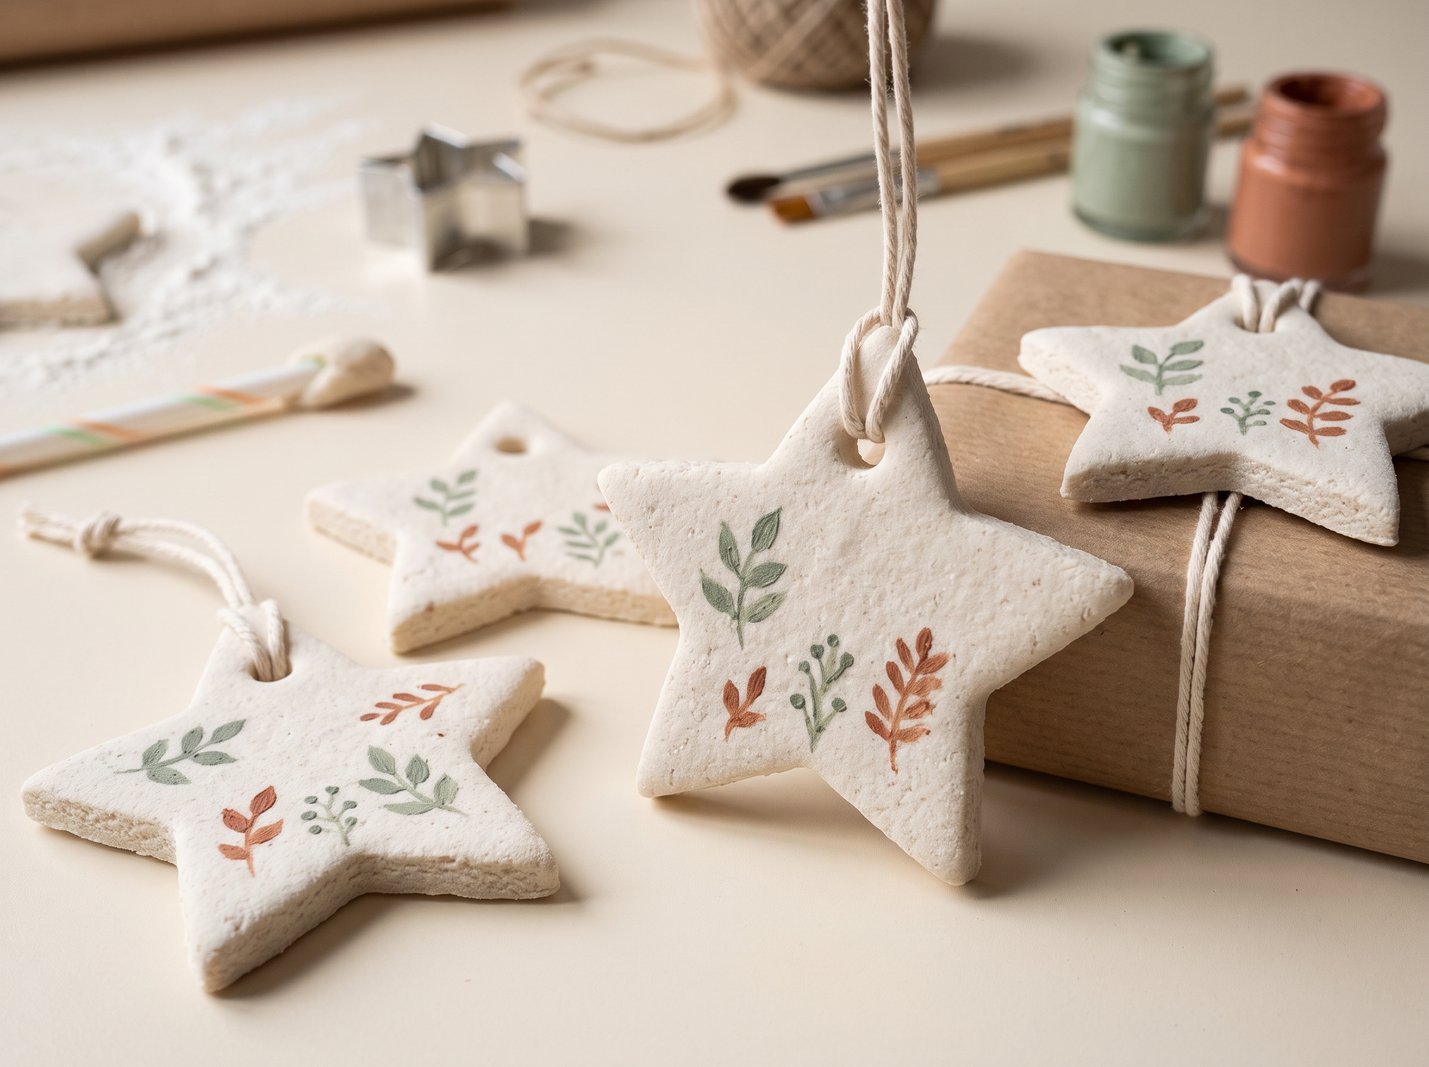
Salt dough stars offer a handmade alternative to paper tags, with a slightly rustic finish that looks especially pretty against plain brown gift wrap. Leave them pale and minimal or paint a small botanical detail once they have fully dried. Recipients can even keep them as ornaments after opening the gift.
You’ll need:
- Flour
- Table salt
- Water
- Mixing bowl
- Rolling pin
- Star-shaped cookie cutter
- Drinking straw or skewer for holes
- Paint and brush, optional
- Twine
Make a basic salt dough with flour, salt, and water, mixing until it can be rolled without crumbling. Roll to an even thickness, cut out stars, and make a hole near the top before drying thoroughly. Once the pieces are cool and firm, add a painted motif and thread with twine.
Drying time depends on thickness and method, so check that no moisture remains inside before decorating or storing. These tags are for decoration only and are not edible. Keep them away from pets and very young children.
9. Mini Bottle-Brush Tree Cloche

A tiny bottle-brush tree beneath a clear jar feels like a miniature winter scene, especially on a bookshelf or entryway table. It gives you the look of a decorative cloche without needing a specialized glass dome. A single tree and a little faux snow are often more effective than filling the jar with lots of extras.
You’ll need:
- Small bottle-brush Christmas tree
- Clean clear glass jar
- Sturdy cardboard disk or small display base
- Craft glue
- A little faux snow
- Optional narrow ribbon
Cut a base that fits beneath the jar opening and secure the tree to its center. Add a restrained dusting of faux snow, then invert the glass jar over the scene. If you like, tie a narrow ribbon around the base or jar neck to finish.
Check the jar’s balance before placing it anywhere it might be bumped. Keep the display on a stable shelf, avoid loose glitter around small children and pets, and use an appropriately sized tree so the branches do not press against the glass.
10. Book Page Paper Cone Trees
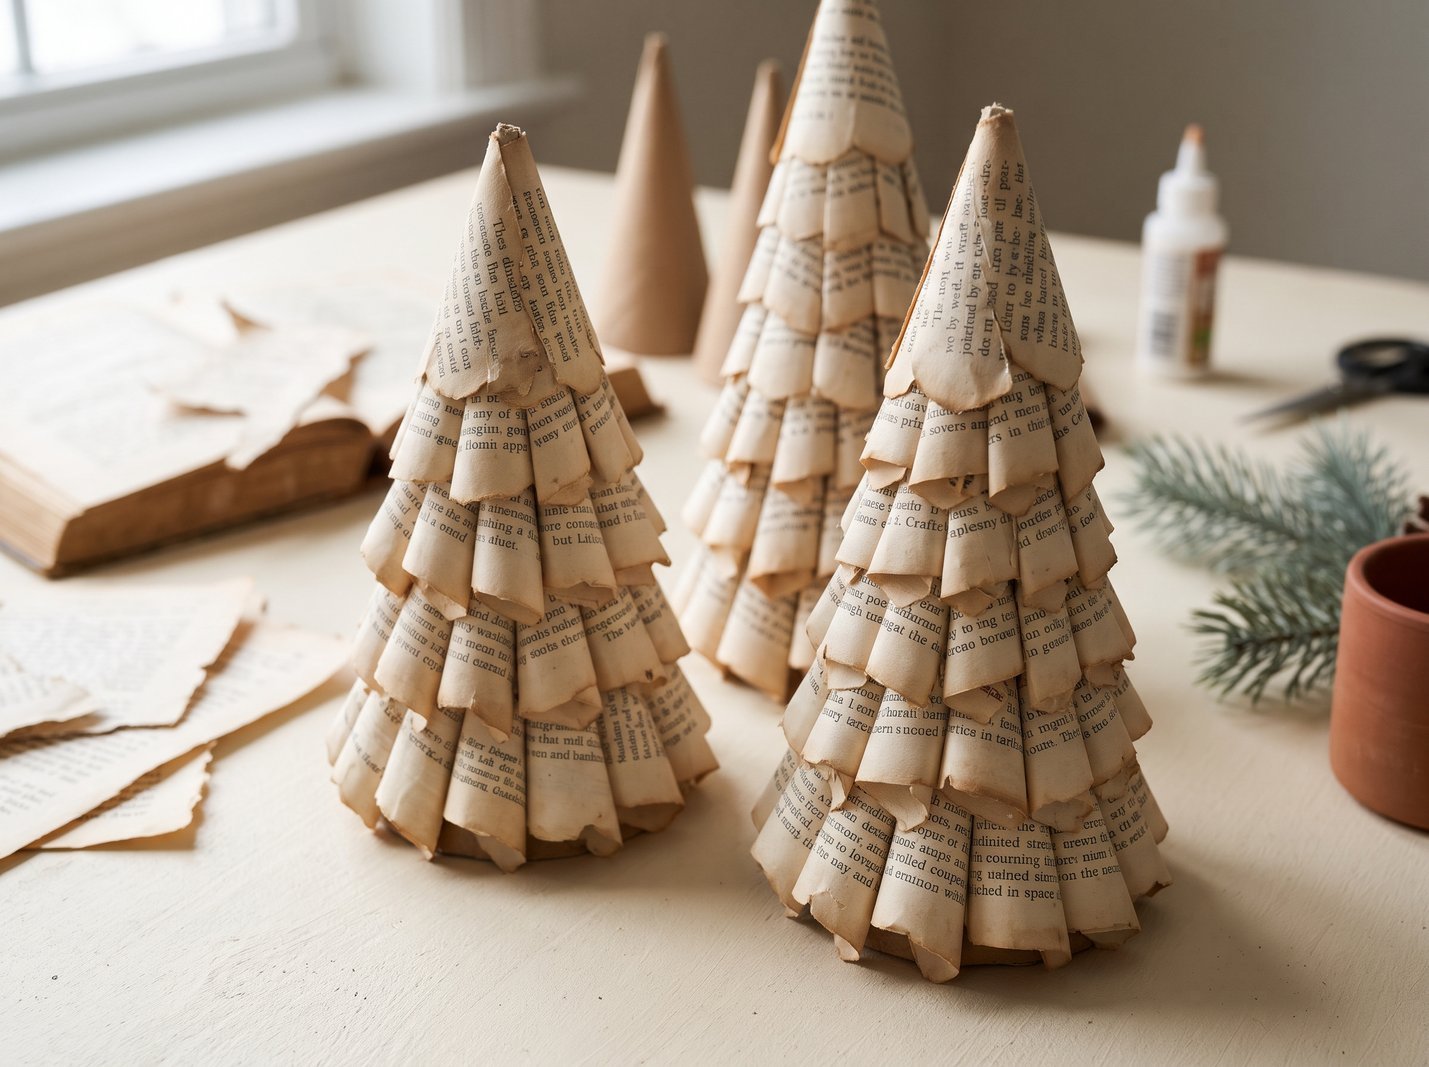
Old book pages or recycled printed paper can become beautifully textured tabletop Christmas trees. The overlapping cones resemble feathery branches and work well with vintage ornaments, warm wood, and candle-free displays. The effect is detailed, but the technique relies on one simple shape repeated patiently.
You’ll need:
- Unwanted book pages or recycled printed paper
- Cardboard cone or handmade cardstock cone
- Craft glue or paper adhesive
- Scissors
- Optional small paper star
Roll paper pieces into small narrow cones and secure each one with a dot of glue. Working from the bottom of the cardboard form upward, attach overlapping rows of paper cones until the structure is covered. Finish the top with a tighter cone or a small paper star.
Choose pages from a damaged or unwanted book rather than one you value. Too much glue can wrinkle thin paper, so apply it sparingly. Slightly irregular points give the finished tree a softer, more handmade silhouette.
11. Pom-Pom Candy Cane Garland
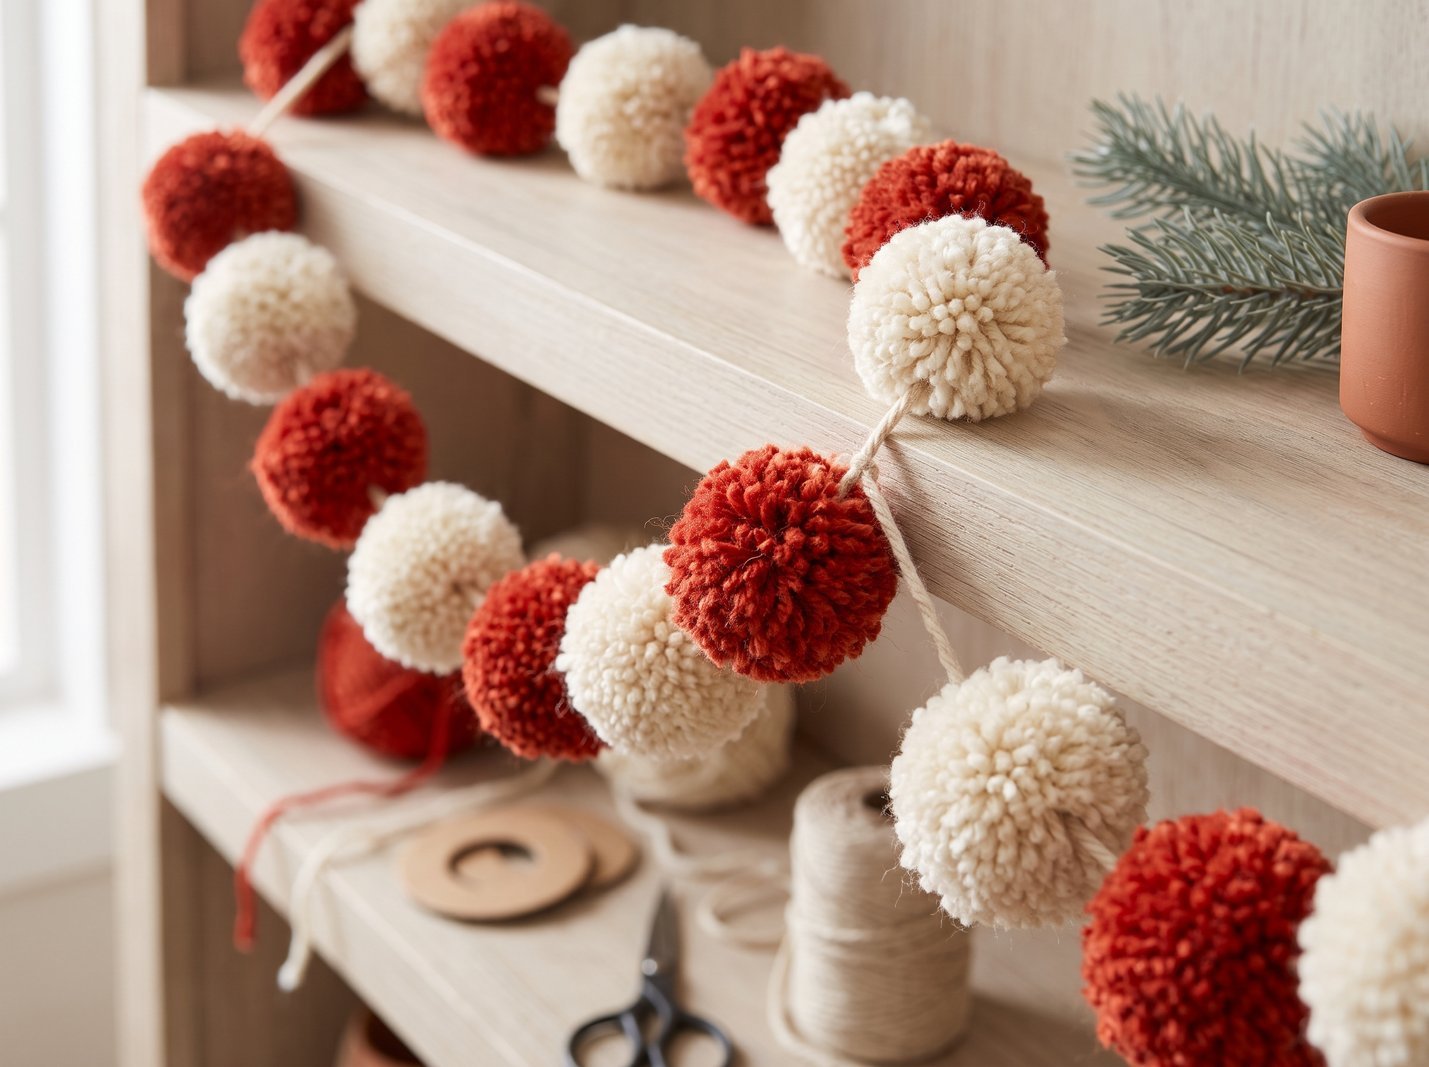
Red and cream pom-poms give a Christmas garland plenty of color and softness without complicated construction. Draped across a shelf, they look playful beside paper decorations and simple greenery. You can make the pom-poms large for a bold look or small for something more delicate.
You’ll need:
- Red yarn
- Cream or white yarn
- Pom-pom maker or cardboard rings
- Strong cord or thick thread
- Scissors
- Large-eye needle, optional
Make a batch of small red and cream pom-poms, tying each securely through the center before trimming into a rounded shape. Alternate the colors as you thread or tie the pom-poms along a strong cord, leaving a little breathing room between them.
Fluff each pom-pom with your fingers before trimming; this helps the garland look evenly finished. Long hanging cords can pose an entanglement risk, so position the decoration safely away from babies, toddlers, and pets.
12. Pinecone Christmas Place Cards

Pinecones make charming little holders for name cards at a Christmas dinner, bringing texture to the table without adding clutter. Their natural shape pairs beautifully with linen napkins, evergreen sprigs, and simple white plates. A light dusting of paint can suggest frost, though the pinecones are lovely left plain.
You’ll need:
- Clean, fully dry pinecones
- Cream or kraft cardstock
- Pen or paint marker
- Scissors
- Optional white craft paint and small brush
- Optional narrow ribbon
Trim cardstock into small folded name cards and write the names clearly. Choose pinecones that stand steadily on their bases, then tuck the cards gently between the upper scales. If you want a frosted effect, brush a little white paint across the tips and let it dry first.
Test each pinecone before setting the table; an unstable one can tip over beside plates and glasses. Avoid forcing the cards between tightly closed scales, and keep optional ribbon details understated so guests can still read the names.
13. Washi Tape Christmas Greeting Cards
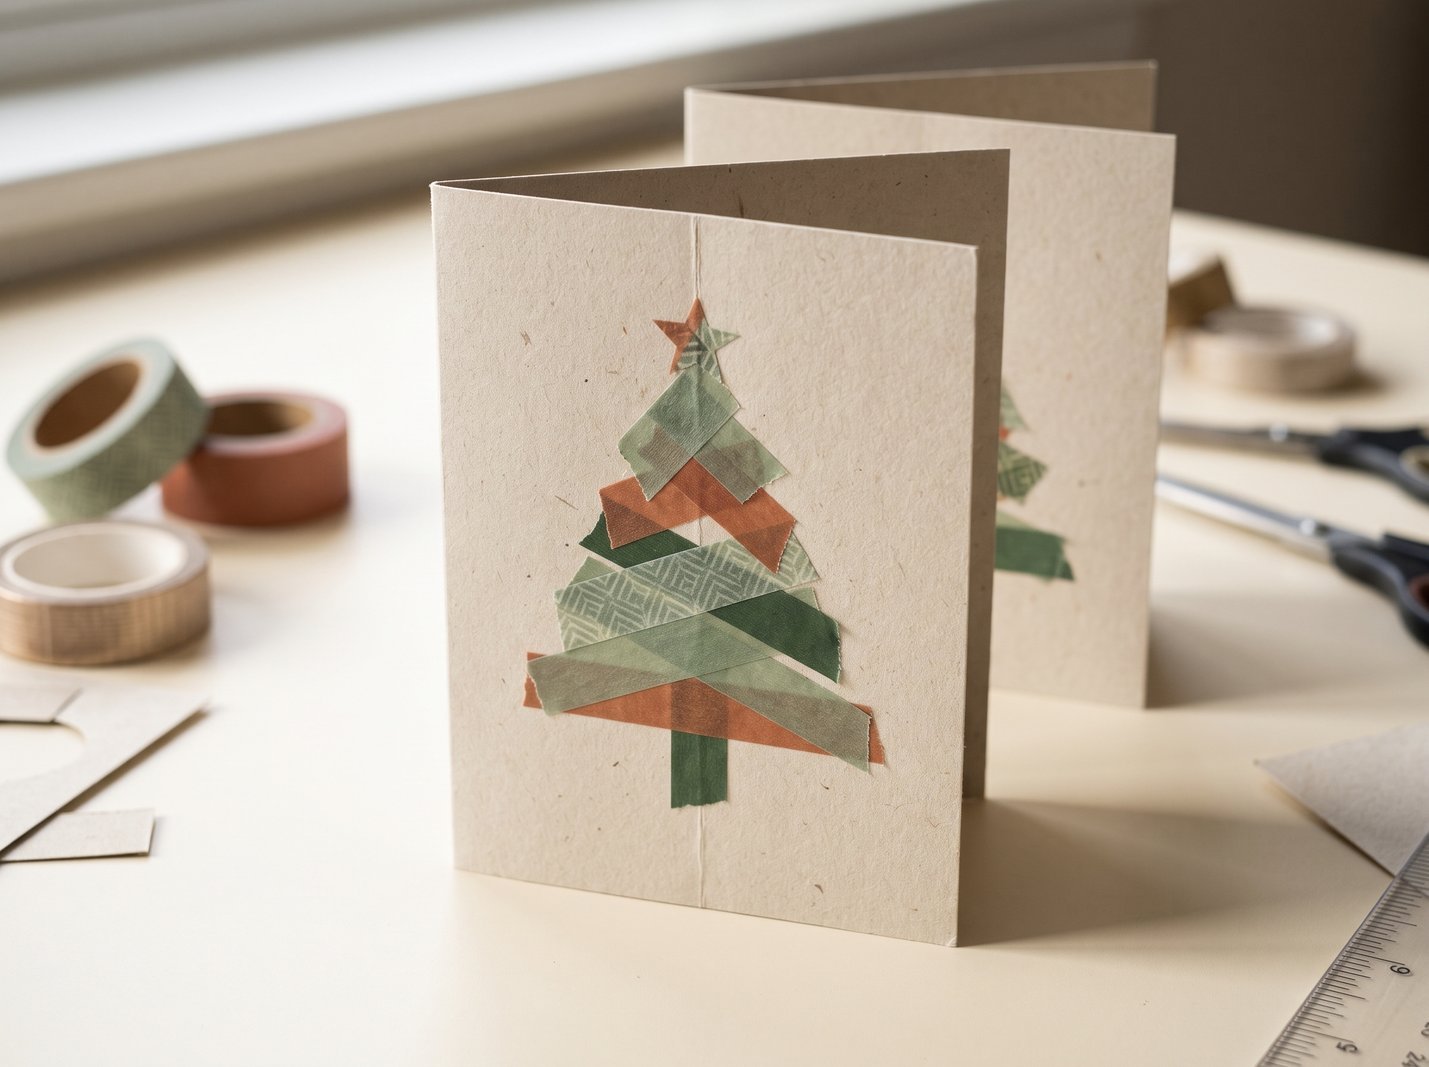
A handmade Christmas card does not have to involve drawing or elaborate paper cutting. Strips of festive washi tape can form a tidy little tree, making this a quick project for people who enjoy stationery and clean graphic designs. Try matching the tape colors to your gift wrap for a cohesive holiday look.
You’ll need:
- Blank folded cardstock cards
- Festive or patterned washi tape
- Scissors
- Ruler
- Small cardstock scrap for a star
- Pen for the message
Arrange horizontal strips of washi tape from longest at the bottom to shortest at the top, creating a triangular Christmas tree. Press the tape flat, add a tiny cardstock star if desired, and write your greeting inside the folded card.
Smooth cardstock helps the tape adhere neatly, especially at the ends. If the cards will be mailed, keep all decorations flat and check that your chosen tape does not peel up when folded or placed in an envelope.
14. Felt Holly Napkin Rings

Soft felt holly leaves make reusable napkin rings that feel festive without looking overly formal. The contrasting red berries are a small but effective detail against green felt, and the whole project pairs nicely with neutral dinner linens. Make one for each place setting for a coordinated Christmas table.
You’ll need:
- Green craft felt
- Red felt scraps
- Cardboard tube or preformed cardboard rings
- Fabric glue or needle and thread
- Scissors
- Pencil
Cut cardboard rings to a consistent width and cover them with green felt. Cut two or three pointed holly leaves and a few small red circles, then glue or stitch the leaves and berries together on the front of each ring.
Slip a rolled napkin through a sample ring before making the full set; a ring that is too narrow will squash the fabric. Stitched accents tend to withstand repeated holiday use better than pieces attached with a small dab of glue.
15. Popsicle Stick Sled Ornaments

Miniature wooden sleds are cheerful tree ornaments that are especially fun to make in a matching set. A bright painted seat contrasts nicely with the natural wood of the runners, while a simple twine loop lets each sled hang from a branch. Their flat construction also makes them easy to store after Christmas.
You’ll need:
- Wooden craft sticks
- Craft glue suitable for wood
- Acrylic paint and small brush
- Scissors or suitable craft-stick cutter
- Cord or twine for hanging
Paint the sticks you want to use for the seat and let them dry. Arrange three short seat sticks across two longer runners, dry-fit the shape, and glue the pieces securely in place. Add a small crossbar if needed and fix a hanging loop to the upper end.
Use a work surface that keeps the runners level while the glue dries. The finished sled is a lightweight decorative ornament, not a toy that can hold gifts or weight, so keep its construction small and simple.
16. Paper Quilled Snowflake Ornaments

Paper quilling gives snowflake ornaments a delicate, lace-like finish that looks intricate even with a limited number of shapes. A six-point design in white or pale blue feels especially wintery against dark evergreen branches. This project is best for someone who enjoys slower, detail-focused crafting.
You’ll need:
- Paper quilling strips
- Quilling tool or suitable thin rolling tool
- Clear-drying craft glue
- Flat work surface or nonstick craft mat
- Tweezers, optional
- Fine thread for hanging
- Optional clear sealant suitable for paper
Roll strips into small coils, gently loosen them, and pinch some into teardrops or pointed loops. Arrange six matching arms around a center coil, then glue the touching edges and allow the snowflake to dry flat before adding a hanger.
Repeat a simple shape consistently rather than trying elaborate patterns on your first ornament. Quilling pieces are fragile until the glue is dry, and very young children may find the tiny coils difficult to manage.
17. Twine-Wrapped Christmas Bells
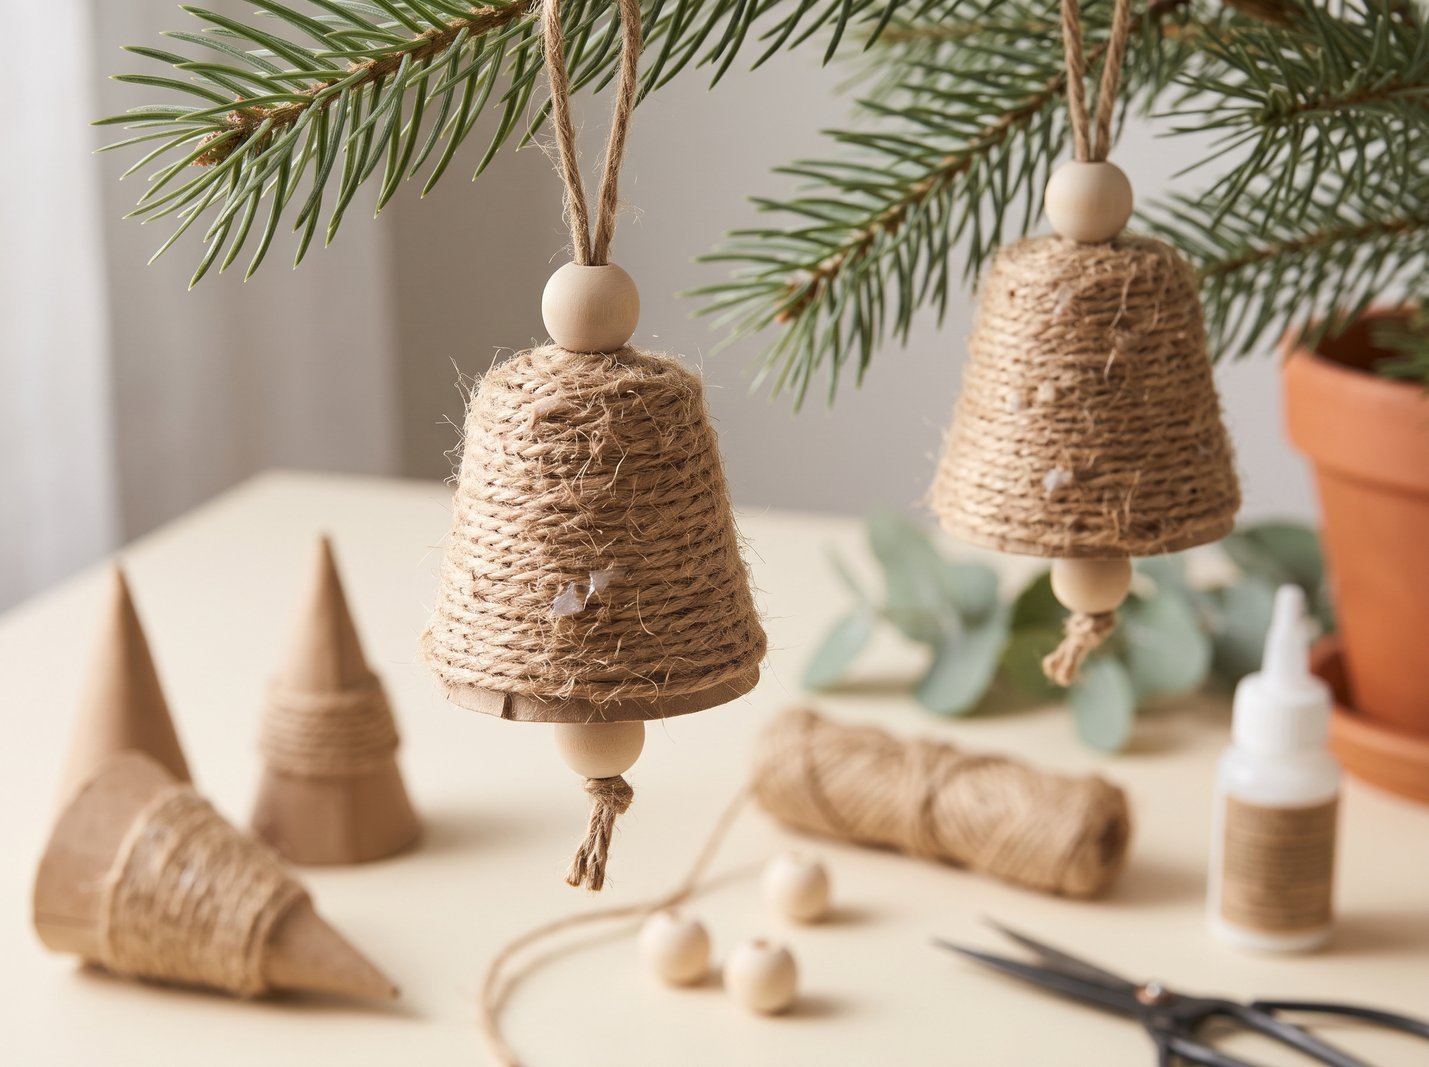
Rustic twine-covered bells look lovely tucked among natural garlands and paper stars. Although they do not ring like metal bells, their textured shape brings a handcrafted farmhouse detail to Christmas decorating. The subtle wooden bead beneath each cone gives the finished piece a recognizable bell silhouette.
You’ll need:
- Small recycled cardboard cones or sturdy cardboard
- Jute twine
- Craft glue
- Small wooden beads
- Short string for clappers
- Scissors
- Twine for hanging
Make or trim a sturdy cardboard cone to the size you want. Glue the end of the jute twine near the rim and wrap upward in close rows, adding glue a short section at a time. Tie a wooden bead beneath the cone as a decorative clapper and secure a hanger at the top.
Keeping the twine snug prevents gaps that expose the cardboard. These are decorative, silent bells rather than functional ornaments with moving metal parts, so they are best displayed where texture matters more than sound.
18. Hand-Stamped Kraft Gift Wrap
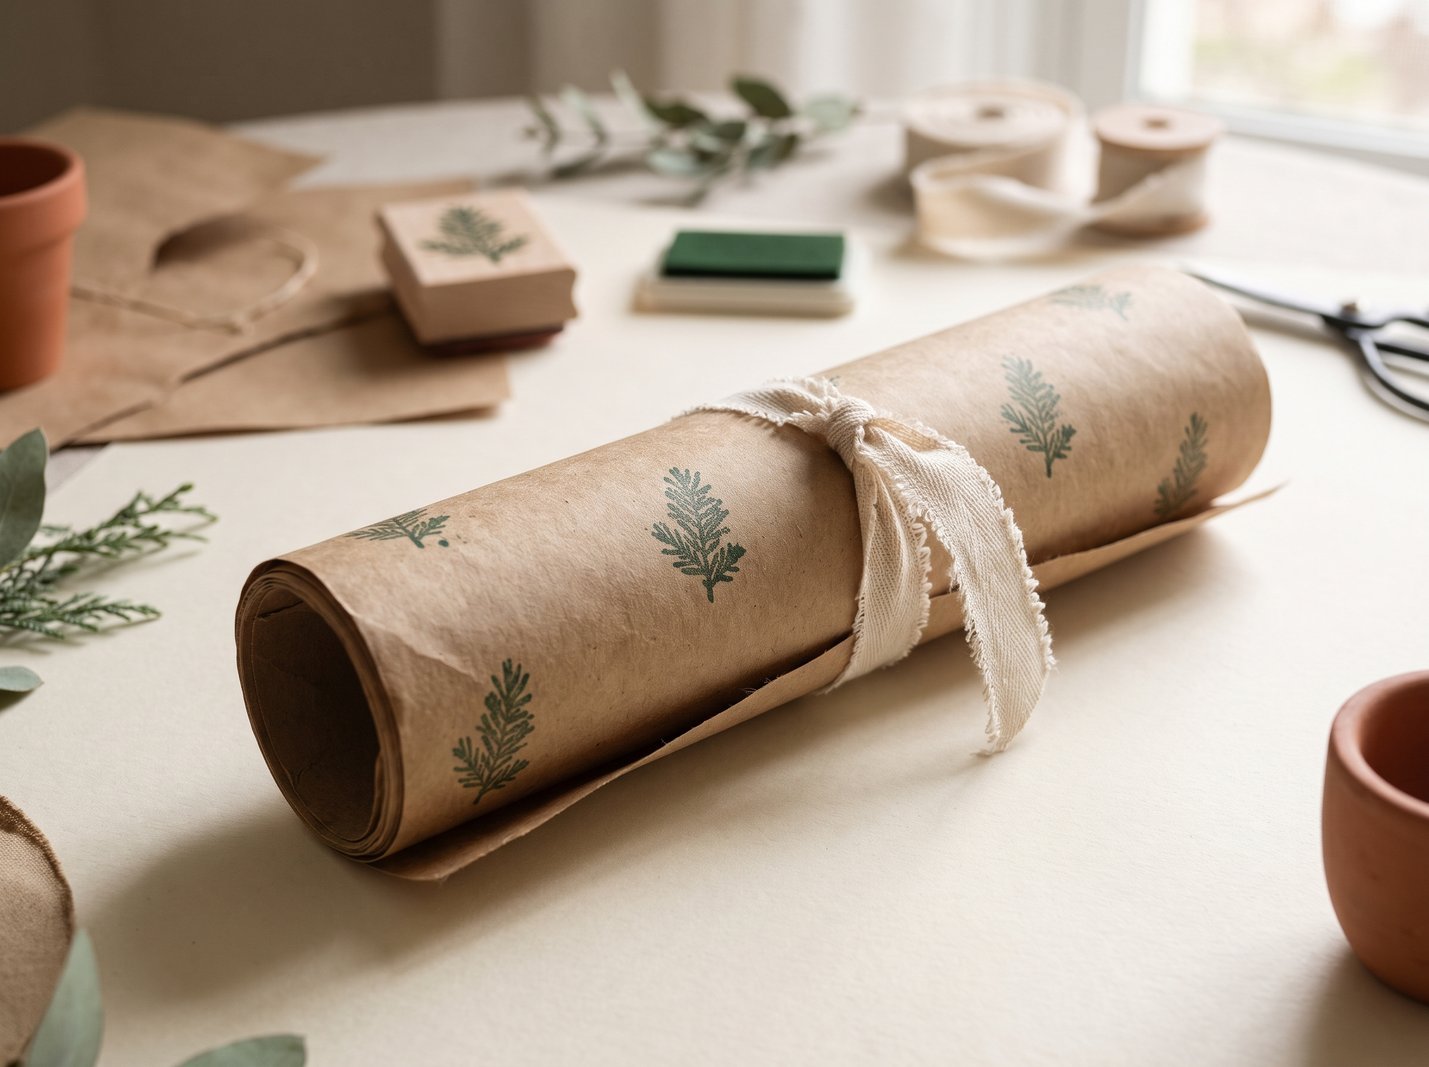
Plain kraft paper becomes special with a restrained pattern of hand-stamped evergreen sprigs, stars, or snowflakes. The result looks relaxed and personal, and it makes simple cotton twine or a ribbon bow stand out. This is an especially practical craft when you have several gifts to wrap in the same style.
You’ll need:
- Kraft wrapping paper
- Small rubber stamp with a festive motif
- Water-based stamping ink
- Scrap paper for testing
- Plain cotton twine or ribbon
- Scissors
Unroll the kraft paper on a protected flat surface and test the stamp on a scrap first. Stamp your motif across the paper, leaving generous spaces between the impressions. Allow the ink to dry fully before wrapping gifts and tying them with twine or ribbon.
Porous kraft paper can blur when a stamp carries too much ink, so use a light, even application. A slightly irregular repeat feels naturally handmade; there is no need to line up every motif with machine-like precision.
19. Clothespin Reindeer Gift Toppers

A simple wooden clothespin can become a little reindeer that clips onto a wrapped gift, place card, or kraft tag. Its miniature antlers and warm brown finish give it personality without needing many decorative extras. This is a charming way to personalize several presents with inexpensive materials.
You’ll need:
- Wooden clothespins
- Brown craft paint and brush
- Brown cardstock or felt for antlers
- Craft glue
- Fine-tip marker for eyes
- Scissors
Paint a clothespin brown and allow it to dry. Cut small antlers from sturdy cardstock or felt, glue them above the gripping end, then add two simple eyes with a marker. Let the details set before clipping the reindeer onto ribbon or cardstock.
Keep the antlers small and lightweight so the clip still opens easily. Skip loose miniature embellishments when crafting with younger children, since detachable pieces can be a choking hazard.
20. Marbled Paper Baubles

Swirled patterns give plain paper Christmas baubles a handmade finish that is different every time. Muted green, cream, and terracotta make them feel sophisticated, while brighter colors create a more playful set. Because the decorations are flat, they can work as either ornaments or oversized gift tags.
You’ll need:
- Thick paper or cardstock cut into bauble shapes
- Washable paints in two or three colors
- Shallow nonfood tray or suitable marbling surface
- Protective scrap paper
- Hole punch
- Craft string or ribbon
Prepare several sturdy paper bauble shapes and protect the table. Spread small amounts of paint on the tray and draw a simple swirl through the colors, then lightly touch the paper shape to the pattern. Lift carefully, let it dry flat, and add a hanging hole and string.
Start with very little paint; excess liquid can muddy the colors and warp thin paper. Experiment on a spare shape first, and use washable products only on a dedicated craft surface rather than food-preparation equipment.
21. Embroidery Hoop Christmas Wreaths

Small embroidery hoops create airy wreaths that look beautiful on an interior door or arranged together on a wall. Instead of covering the whole circle, a single cluster of greenery and a ribbon bow gives them a modern, minimal look. They also make a thoughtful handmade decoration for someone who prefers subtle holiday styling.
You’ll need:
- Small wooden embroidery hoops
- Narrow fabric strip or ribbon
- Small faux greenery sprigs
- Needle and thread or suitable craft glue
- Scissors
- Extra ribbon for hanging
Wrap the hoop with a narrow ribbon or leave some of the natural wood exposed. Position a small spray of faux greenery on one side and secure it with thread or glue, then tie on a little bow and a hanging loop.
Balance matters more than quantity: heavy embellishments can pull a small hoop out of shape. Secure the greenery firmly, and keep decorative elements clear of the hoop’s tightening hardware if you want the design to lie neatly against a wall.
22. Tissue Paper Stained-Glass Stars

These translucent paper stars glow in a bright window, giving you a stained-glass effect with ordinary craft supplies. A bold cardstock outline frames the softer tissue-paper colors, and several stars can bring cheerful color to a winter afternoon. The finished decoration is lightweight enough for temporary window displays.
You’ll need:
- Black or dark cardstock
- Translucent colored tissue paper
- Glue stick
- Scissors
- Pencil and star template, optional
- Removable window-safe tape
Draw a large star outline on cardstock and cut away the center to make a frame. Glue overlapping tissue-paper pieces across the opening from the back, then cover the joins with a second cardstock frame. Let the glue set before displaying the star on glass.
Tissue paper, not heavy construction paper, is what makes the colors glow in daylight. An adult should handle cutting the inner star window for younger makers, and removable tape helps avoid residue on the glass.
23. Mini Yarn-Wrapped Trees
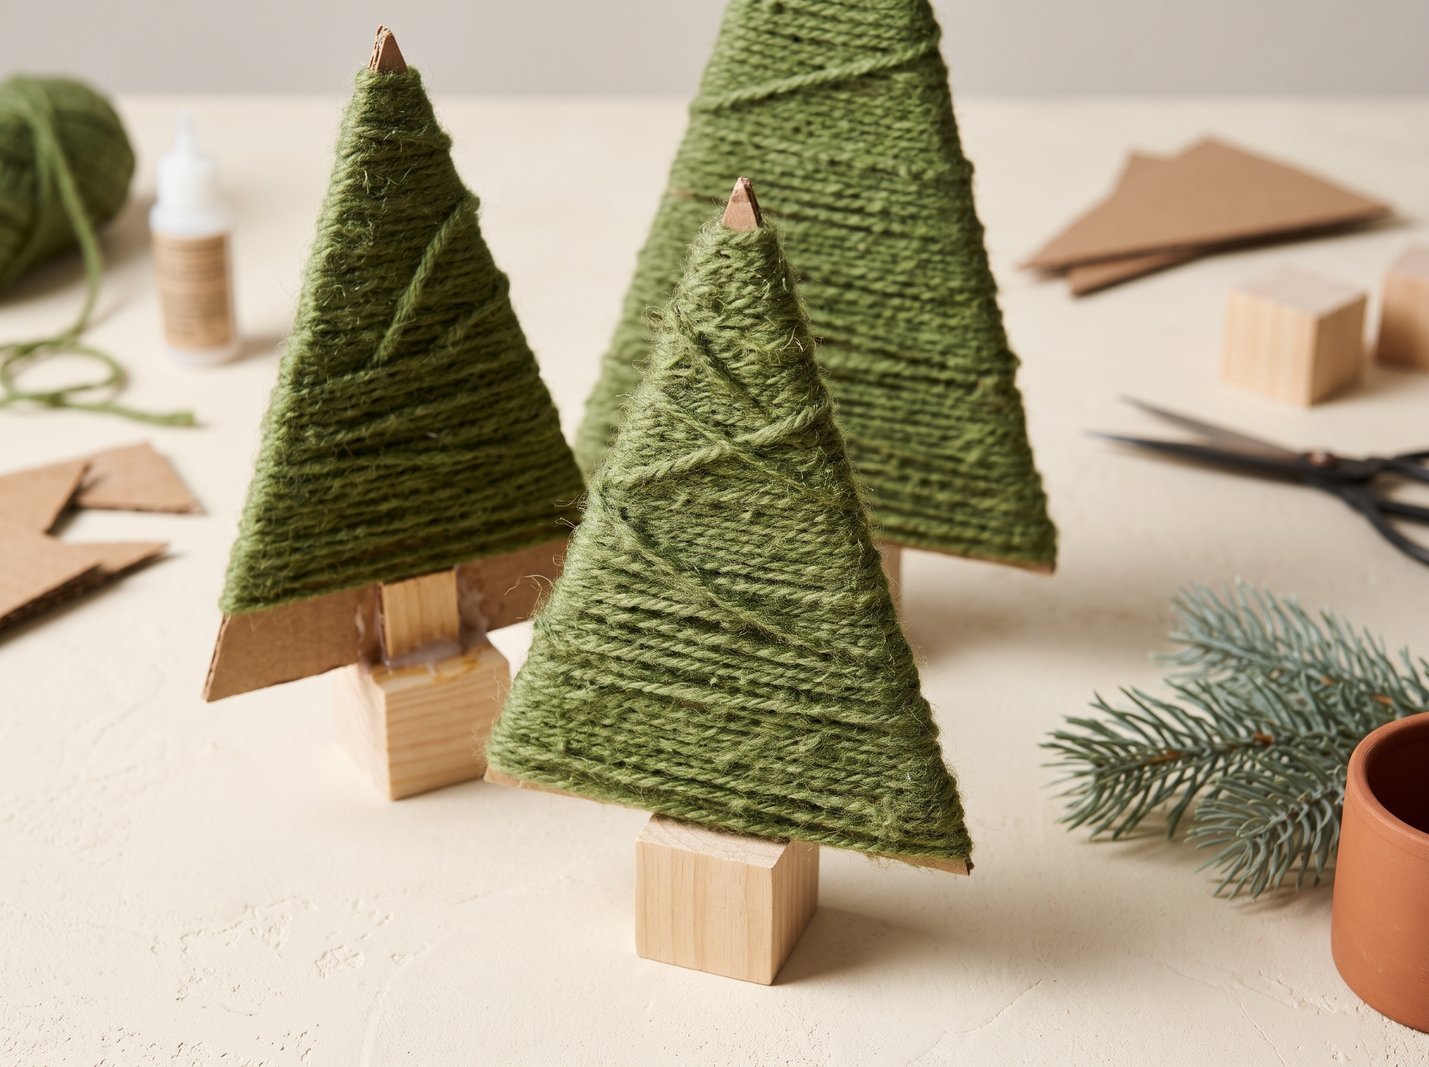
A few yarn-covered trees make a cozy tabletop display with appealing texture and little need for embellishment. Their triangular silhouettes look especially good grouped in three different heights, using moss green, forest green, and cream yarn. This is a satisfying way to use up the last pieces of a yarn bundle.
You’ll need:
- Rigid cardboard
- Green or cream yarn
- Scissors
- Craft glue
- Pencil and ruler
- Small wooden bases or folded cardboard supports
Cut sturdy cardboard triangles and make shallow notches near the edges to keep the yarn from slipping. Wrap yarn around each triangle until the surface is mostly covered, securing the beginning and end with glue. Slot the finished trees into simple stands or attach cardboard feet.
Thin printer paper will buckle under the yarn, so use a rigid backing. Wrap firmly without bending the triangle, and vary the heights rather than adding many tiny decorations that might hide the attractive yarn texture.
24. Button Christmas Tree Art
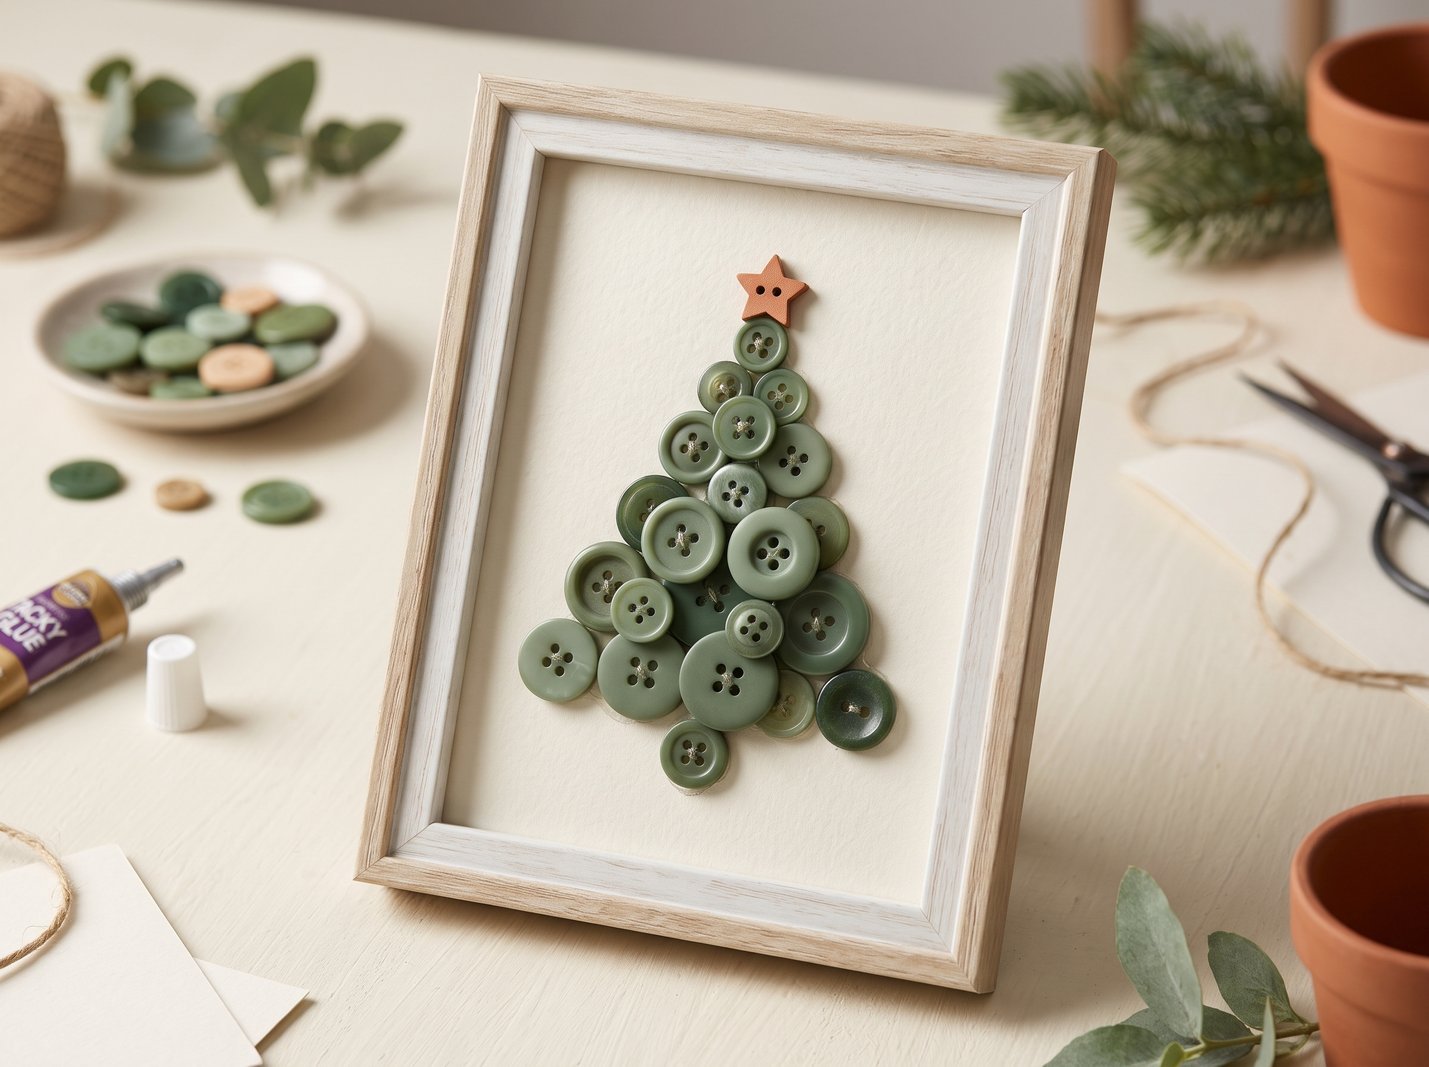
A collection of mismatched green buttons can become a festive little artwork with texture and character. The different shapes and shades make the tree interesting without requiring detailed drawing skills. Once framed, it can sit on a mantel or become a handmade seasonal card for someone special.
You’ll need:
- Assorted green buttons in different sizes
- Heavy cream or white cardstock
- Tacky craft glue
- Small paper star
- Pencil
- Optional small frame
Arrange the buttons loosely into a tapered tree silhouette, starting with wider rows at the base and gradually narrowing toward the top. Adjust the balance of sizes before gluing anything down, then secure each button and add a paper star at the peak.
Let the glue cure on a flat surface before lifting the artwork into a frame. Small loose buttons are a choking hazard, so this is best treated as an adult-supervised craft when children are involved.
25. Ribbon Scrap Christmas Tree Tags

Save the last few inches of ribbon from gift wrapping and turn them into festive tree-shaped tags. Layers of velvet, cotton, or gingham ribbon add texture to plain kraft paper, making even a simply wrapped present feel personal. These are quick to assemble once your scraps are sorted by length.
You’ll need:
- Leftover ribbon scraps
- Blank kraft gift tags
- Craft glue suitable for fabric and paper
- Scissors
- Hole punch, if needed
- Cotton string or twine
Arrange ribbon pieces horizontally across a tag with the longest strip at the bottom and each strip above it slightly shorter. Glue the pieces in place to form a tree, then add a narrow vertical piece for the trunk. Finish by threading string through the top hole.
Lightweight ribbon is easier to adhere neatly than thick, heavy trim. Leave room at the top for the hole, and dry the tags flat before stacking or tying them onto gifts.
How to Choose the Right Craft for Your Day
For fast decorations, try washi tape cards, pinecone place cards, ribbon gift tags, or stamped wrapping paper. If you enjoy careful detail work, paper-quilled snowflakes and folded paper stars offer more room to slow down. Paper bag snowflakes and garlands have the biggest visual impact when you want to decorate a room rather than just a tree.
To avoid a half-finished project pile, make one sample first. Check how it hangs, stands, or folds, and only then prepare materials for several copies. That small trial makes a difference when you are crafting for gifts, a holiday gathering, or a festive afternoon with friends.
Final Thoughts on These Christmas Craft Ideas
The nicest Christmas crafts are often the ones you will want to bring out again next year. Pick one idea that suits the materials you already own, make a trial version, and refine it before producing a whole set. A few thoughtful handmade pieces can feel more personal than a room full of complicated decorations.